


Saito's New Engine: FG-90R3
 11-20-2021, 09:16 PM
#526
Lets see if we can get a sensible response to this question.
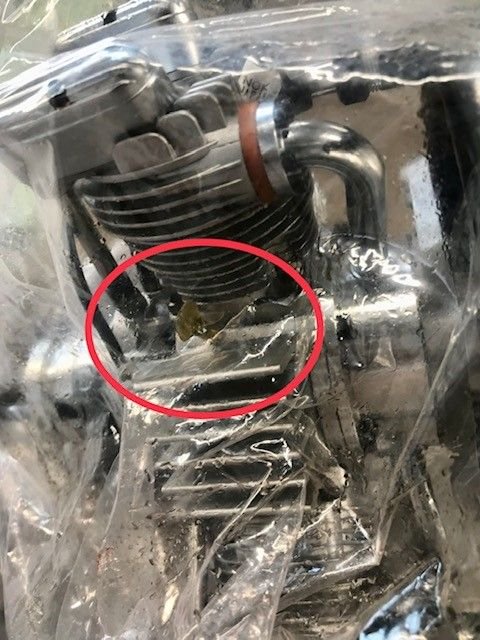
Those who have had Ray modify your FG90 did you end up with an additional nipple between number 1 & 3 cylinders? If so what was it's purpose and does it stay open or is it to be blocked off?
TIA
Those who have had Ray modify your FG90 did you end up with an additional nipple between number 1 & 3 cylinders? If so what was it's purpose and does it stay open or is it to be blocked off?
TIA


The following users liked this post:
rcpollo (11-22-2021)

 11-23-2021, 07:27 PM
#535
I'd send it to Ray to do the work.
The following users liked this post:
dunk (11-23-2021)
11-24-2021, 06:44 AM
#537

My Feedback: (2)
"My friends the 3 sparks on the CDI’s are only up to 300 RPM for START ONLY. !!! Before starting the computer does not know what cylinder to fire. That is why ALL spark plugs fire at once. One of the cylinders will be on POWER stroke and will fire; once the engine fires and rotates and is above 300 RPM the Reset magnet will tell it to fire 1,3,2 and start the sequence firing order. Now…the issue you have is actually the TIMING of the engine. The factory timed the engine 47 BTDC and it is too advanced and uses a 30BTDC CDI…also there is a timing issue in between the #2 and #3 cylinder one is advanced more and one less. This New Prop Drive Flange sets the timing in accordance with the CDI (30BTDC) and corrects the timing between cylinders #2 &3. You can replace the prop drive and the engine will be running like a Swiss clock. We designed this in such a manner to minimize the set of skills necessary, no timing tools and other expenses involved. It is an easy DIY."
From speaking via phone to Mr. English, I believe he uses the uses the original Saito prop drive hub and makes the correction directly on it. The other mod he makes is to correct and enlarge the tolerance of the master rod bronze bushing. The factory Saito bushing tolerance is 0.001". His correction enlarges the tolerance to 0.003" which allows better lubrication to the rod bushing. Trying to recall this from memory, so please correct me if I have misrepresented his modifications.
Regards - J Tab
11-24-2021, 09:15 AM
#538

My Feedback: (153)
So what's the advantage of the bushing mod? More tolerance so you have less o a chance of seizure due to better lubrication and maybe a fewer more rpms?
I'd like to know if after Ray's mods if the cylinder temps are more inline or if a guy needs the MMM intake to achieve this.
I'd like to know if after Ray's mods if the cylinder temps are more inline or if a guy needs the MMM intake to achieve this.
11-24-2021, 12:11 PM
#539
My Feedback: (2)
Larger radials like the Moki, (I own two) use needle bearings as opposed to bronze bushings in a Saito. The Moki draws its fuel from the carb which goes directly into the crankcase. From the crankcase the oil is dispersed into the intake tubes to feed the cylinders. That's why the Moki can use a leaner gas/oil mix of 50/1. The needle bearings transfer oil better and have less friction resistance.
The fuel mix in the Saito is fed from the carb into a mixing chamber where it is picked up by the intake tubes and then to the cylinders. The Saito depends on blow-by oil from the combustion to lube the internal rod bushings. Hense the Saito must require a richer fuel/oil mix to adequately lubricate the rod bushings.
I hope to soon acquire a Saito 90 cc radial and pair with a Top RC Focke Wulf. (Can't find one until the next shipment - darn covid delays) My personal thought is to purchase the Saito through my local hobby shop and install the prop drive flange upgrade myself to correct the timing issue. The key, IMO, is a careful break in period using a 15/1 mix and pre-lubing the crankcase before the start of each session.
Regards - J Tab
11-24-2021, 03:37 PM
#540
Larger radials like the Moki, (I own two) use needle bearings as opposed to bronze bushings in a Saito. The Moki draws its fuel from the carb which goes directly into the crankcase. From the crankcase the oil is dispersed into the intake tubes to feed the cylinders. That's why the Moki can use a leaner gas/oil mix of 50/1. The needle bearings transfer oil better and have less friction resistance.
The fuel mix in the Saito is fed from the carb into a mixing chamber where it is picked up by the intake tubes and then to the cylinders. The Saito depends on blow-by oil from the combustion to lube the internal rod bushings. Hense the Saito must require a richer fuel/oil mix to adequately lubricate the rod bushings.
I hope to soon acquire a Saito 90 cc radial and pair with a Top RC Focke Wulf. (Can't find one until the next shipment - darn covid delays) My personal thought is to purchase the Saito through my local hobby shop and install the prop drive flange upgrade myself to correct the timing issue. The key, IMO, is a careful break in period using a 15/1 mix and pre-lubing the crankcase before the start of each session.
Regards - J Tab
The fuel mix in the Saito is fed from the carb into a mixing chamber where it is picked up by the intake tubes and then to the cylinders. The Saito depends on blow-by oil from the combustion to lube the internal rod bushings. Hense the Saito must require a richer fuel/oil mix to adequately lubricate the rod bushings.
I hope to soon acquire a Saito 90 cc radial and pair with a Top RC Focke Wulf. (Can't find one until the next shipment - darn covid delays) My personal thought is to purchase the Saito through my local hobby shop and install the prop drive flange upgrade myself to correct the timing issue. The key, IMO, is a careful break in period using a 15/1 mix and pre-lubing the crankcase before the start of each session.
Regards - J Tab
11-25-2021, 02:54 AM
#541
This 2nd nipple must be blocked! My engine came repaired from Saito after master rod seizure and this nipple was fitted also. I received an instruction from Saito to keep this nipple blocked. Pre-lube of about 30ml of oil must be done after longer period on the shelf, not every time before flight.
11-25-2021, 01:59 PM
#543
My Feedback: (153)
Here is whatMM said.
"All of the engines now come with bronze Bush on the Big end
But all of the engine still need Prop hub and intake upgrade
If you upgrade the intake the vent nipples would have to be blocked off
because the crankcase would become the mixing chamber"
"All of the engines now come with bronze Bush on the Big end
But all of the engine still need Prop hub and intake upgrade
If you upgrade the intake the vent nipples would have to be blocked off
because the crankcase would become the mixing chamber"
11-25-2021, 02:42 PM
#544
I spoke to Ray on the phone, what a lovely fellow to chat with.
The second nipple is on the new build FG90R3 as supplied by Saito. Ray advised you can block it is you want though said just connect the the nipples together via a Tee and run the line about half way up the crankcase on the firewall then down and out of the model.
As for the MMM I got same advice including running it at 30:1 !! I won't be fitting the MMM back plate and will sell that and the timing ring as I won't have a use for either now.
11-28-2021, 02:18 PM
#545
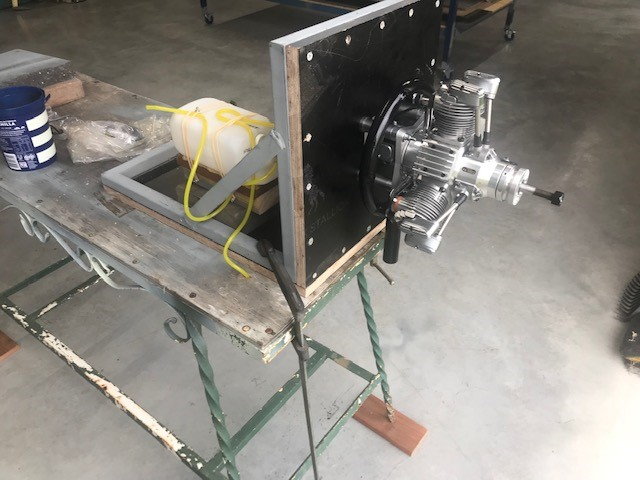
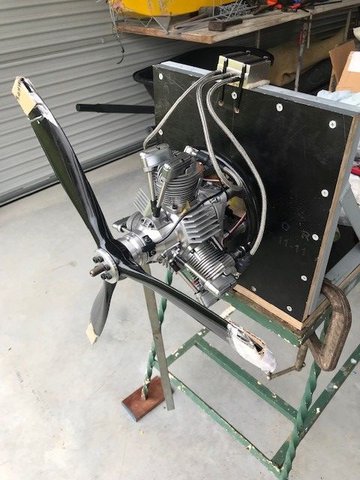
Ran the FG90 on the weekend! What a beast. Was mounted to my test stand, no baffles.
Biela 3 blade FW-190 style 20x12 prop. 15:1 Klotz KL-200 and 98 Octane petrol.
Idle 1290 RPM, peak 6400 RPM though it was getting hot so only did a few bursts at full throttle. I am hoping that when I fit the baffles that will bring those temps down to reasonable levels.
I richend up the top end, low needle was already quite rich.
Engine ran for 84 mins on a 9050mL / 32Oz tank. What a miser! Most of the running was around 3000 RPM with a few burst to 4500 - 6000.
then back to idle to allow it cool down. Lots of burble in the transition which I expect as the mixtures are very rich. Copious amount of black oil expelled from the exhaust.
I'm also getting oil leaking from the exhaust fitting to the head. Is that normal?
My only concern now are those temps. No.1 actually was the best performer and numbers 2 & 3 were getting hotter.
Could be the petrol I was using as it was 98 Octane and I would suspect was making it run hot as well as hit that 6400 peak RPM.
I'll ditch that batch of fuel and use it in the old mower, mix a new batch of 91 Octane, fit the baffle and re-run it.
I did find that the choke rod with the threaded part was useless, pulling the throttle body out as far as it would go would go would not suck fuel but putting finger over the trumpet drew fuel very quickly. I think I will make something that allow for that style of choking when in the plane.
Engine was very easy to hand start.
12-06-2021, 12:52 PM
#546
Gents,
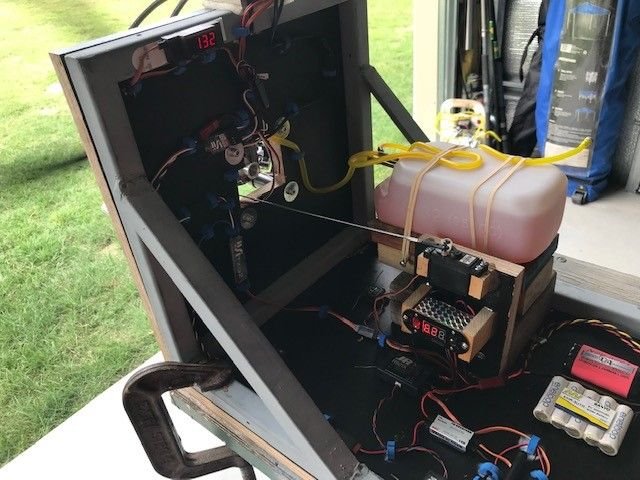
for those with temperature probes on the cylinders how have you mounted them? Around spark plug base or wedged between the fins on top of the cylinders.
I have mine wrapped around the spark plug base but worried the base of the plug is much hotter than the head itself.
I have measured the head in a few spots with a temperature gun and it indicates fairly good temps however the telemetry shows high temps.
thanks
cheers
P
12-10-2021, 10:08 PM
#547
I use the Jeti system's temp probes (MT-300), which will just about wedge themselves snuggly between the Saito cylinder fins and stay there without any further intervention. It's better if the probes' active parts face the back of the cylinders to avoid the cooling effect of the varying oncoming airflow messing with the measurements. The absolute measurement will vary from mounting point to mounting point. For me, wedging the probe between the top fins just below the spark plug works best. In a cowled and baffled install, the engine operates between 125 and 145 Celcius measured at those points.
Last edited by hpergm; 12-10-2021 at 10:38 PM.
12-10-2021, 11:24 PM
#548
I use the Jeti system's temp probes (MT-300), which will just about wedge themselves snuggly between the Saito cylinder fins and stay there without any further intervention. It's better if the probes' active parts face the back of the cylinders to avoid the cooling effect of the varying oncoming airflow messing with the measurements. The absolute measurement will vary from mounting point to mounting point. For me, wedging the probe between the top fins just below the spark plug works best. In a cowled and baffled install, the engine operates between 125 and 145 Celcius measured at those points.
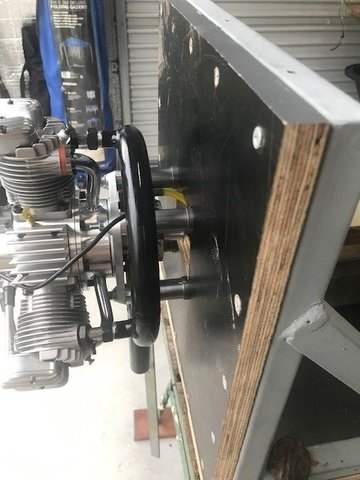
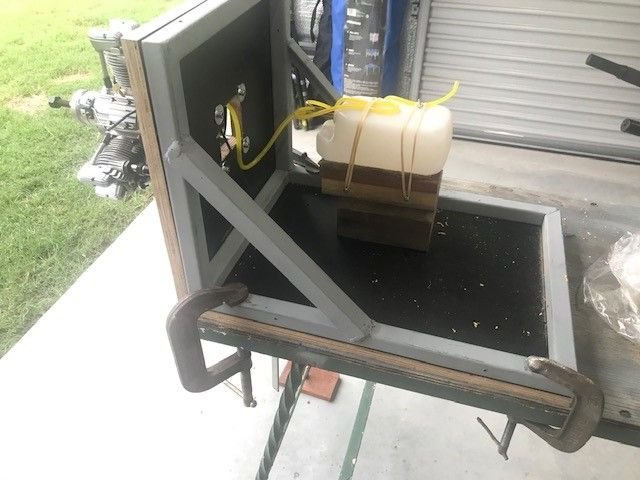
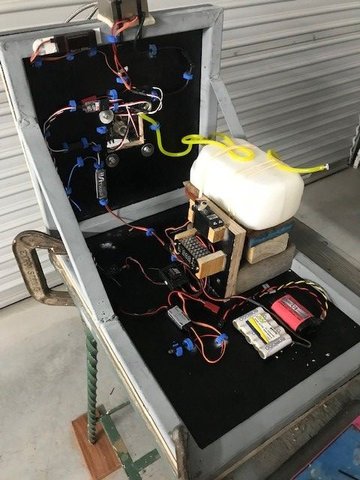
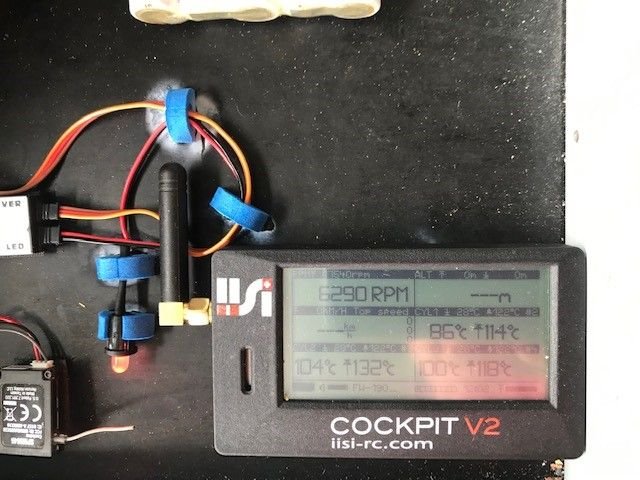
Have fitted the MMM rear induction plate today and adjusted the tappets. I have new NGK CM6 plugs arriving Tuesday so will run it again and see how it performs.
The Telemetry system I am using is the IISI Cockpit V2 as it is standalone. My JR 12X does not have telemetry.
12-11-2021, 12:57 AM
#549
This 2nd nipple must be blocked! My engine came repaired from Saito after master rod seizure and this nipple was fitted also. I received an instruction from Saito to keep this nipple blocked. Pre-lube of about 30ml of oil must be done after longer period on the shelf, not every time before flight.
Carlo
12-11-2021, 02:25 AM
#550
Simply take a syringe and inject 20 - 30 ml of oil through 2nd nipple fitted on top between cyl 1&3 while turning slowly prop anti-clockwise, then block nipple.