


Welcome to Club SAITO !
 10-18-2021, 03:22 PM

Hi glowgeek, Dave, thanks a lot for your inputs! Really appreciate it. I will replumb the fuel tank, and give it a go. Any tell-tale signs, especially at the high and low ends, if the o-rings are not sealing well? Thanks again

 10-20-2021, 04:44 AM
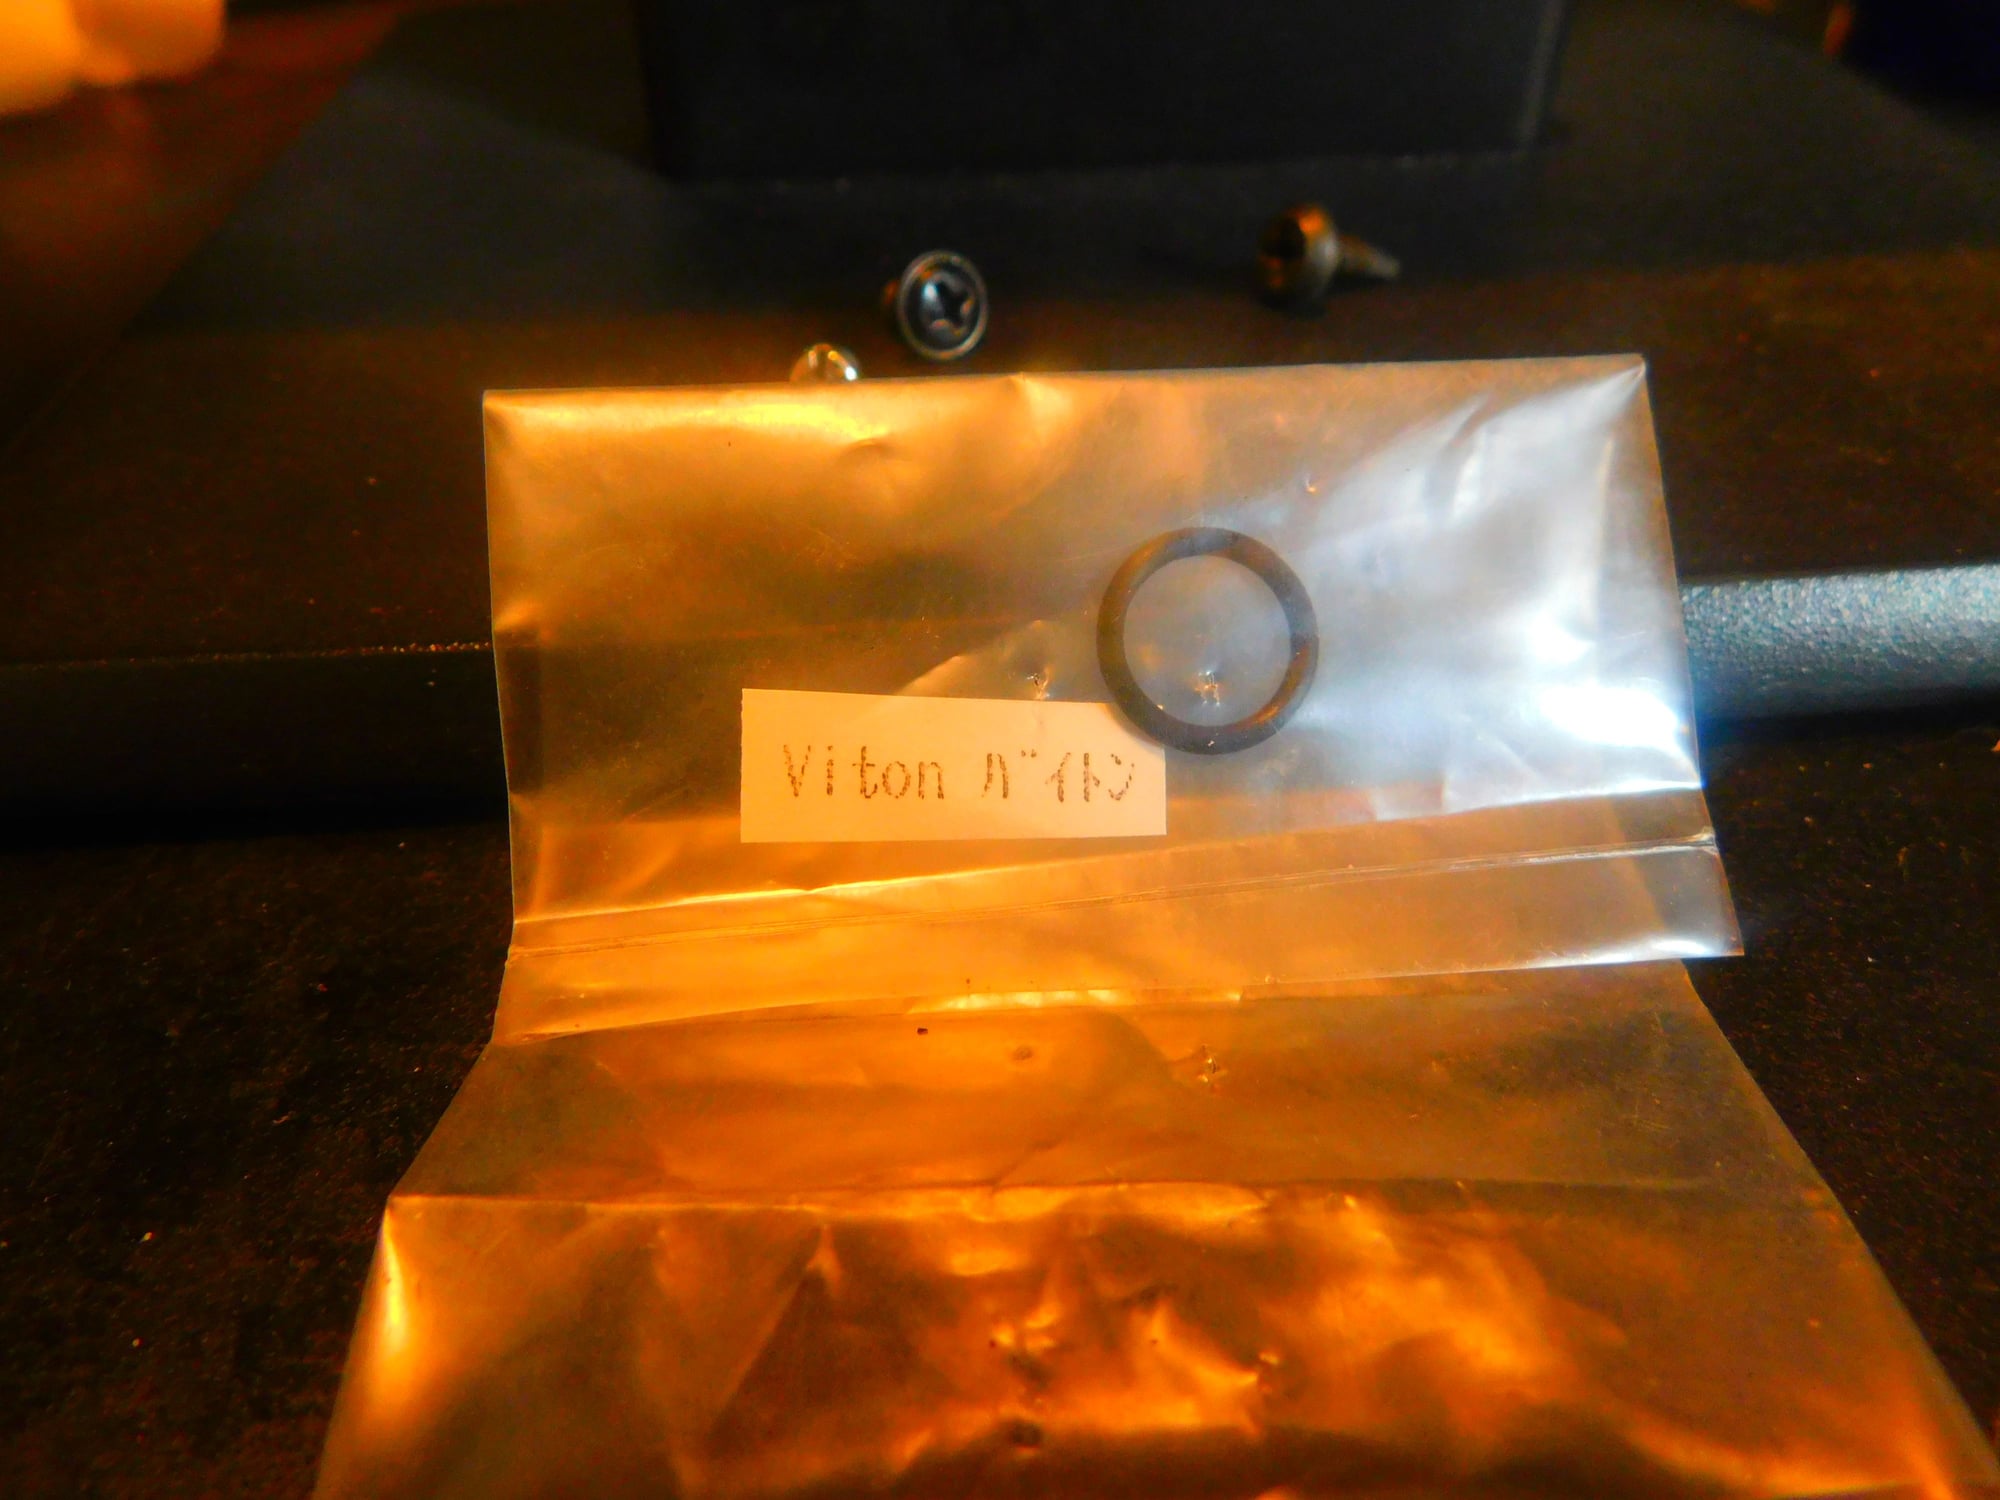
The thin spraybar oring that fits between the carb housing and hsn ratchet spring is not even needed in most cases due to the super tight fit between the spraybar and carb housing. Would be the last thing I checked with a poor running engine.
As far as identifying which oring is bad based on running characteristics, I have seen too many variations to say. Most of the time the intake pipe oring at the cylinder head is the culprit. If that doesn't fix it I replace the rest because in some cases I've found orings that offered good resistance to rotation but were damaged by the previous owner.
Reasons to suspect a bad oring:
Wandering rpm anywhere from idle to wot, engine runs super rich at midrange rpm but idles ok, difficulty finding the sweet spots for needle settings. These symptoms can be caused by other issues however e.g. bad bearings, valve clearance issues, weak/broken valve spring, sticky valve, leaky valve, carbon fouled ring lands/ring, debris in the fuel system, leaks in the fuel/pressure lines etc
So, I can't answer your question specifically but hopefully this info will help in some way.
Lonnie
Last edited by Glowgeek; 10-20-2021 at 04:47 AM.
10-20-2021, 06:07 AM
Senior Member

I have always thought that the little O-ring in the end of the spray bar was more for steadying the needle than sealing, the very fine threads would seal it just fine.
 10-22-2021, 03:26 AM
FWIW: I nowadays wrap a short length of Teflon tape around the threaded part for that extra little bit of seal.
10-22-2021, 04:16 AM
Welcome Bert. I've used Teflon tape on many needles as well, mostly on old Fox 2N carbs. I've not had to use it on a Saito, FA or FG
I agree Dave, the oring for the hsn is not necessary for a sufficient seal, it's there to stop vibration from wrecking the threads when we hang long extension rods/cables from it. The lsn oring provides friction to resist rotation from vibes.
I agree Dave, the oring for the hsn is not necessary for a sufficient seal, it's there to stop vibration from wrecking the threads when we hang long extension rods/cables from it. The lsn oring provides friction to resist rotation from vibes.
Last edited by Glowgeek; 10-22-2021 at 04:19 AM.
10-22-2021, 04:45 AM
10-22-2021, 07:59 AM
Senior Member
I just ran this early Saito 50 with an A on the right mounting lug. It'd early enough that it has a.125" spacer in front of the carburetor. I installed a new crankshaft, Boca Bearings, a new ring and ICBM gaskets in it. It turned an HY 12 x 6 at 9,900 and a Xoar 12 x 6 at 9,750. I ran it today with a standard washer and a single black nut that they came with. The original crankshaft had several threads just crumble off of the end.
Turning about 8,500
Turning about 8,500
 10-22-2021, 09:17 AM
10-22-2021, 01:35 PM
10-22-2021, 09:17 AM
10-22-2021, 01:35 PM
Senior Member
 10-22-2021, 04:47 PM

My Feedback: (27)
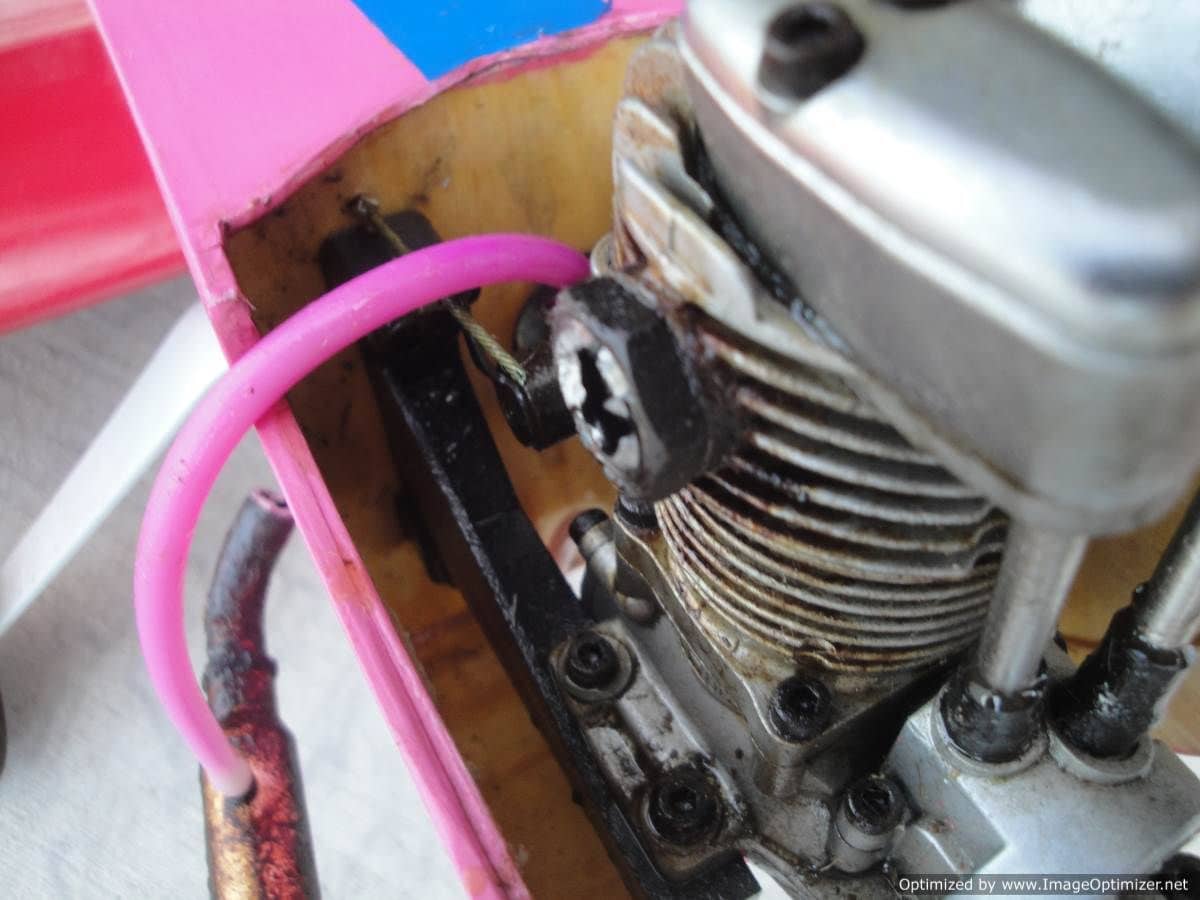
A couple weeks ago I was out flying my Sig 4 Star 60. I have a Saito 80 in it spinning a APC 13X7. I have flown this plane for years. I made a low high speed pass and it sounded better than ever. I made a few more low passes thinking this sounds great. Soon I realized when I pulled up and made a hard turn it was going lean. I landed and this is what I found. I broken exhaust header. Looking online from the usual suppliers I could not find a new 60 degree header. Finaly I found 2 new ones on Ebay at a good price and bought them. Have they been discontinued? What caused it to break like this?
10-22-2021, 05:41 PM
My Feedback: (1)
hey guys, back to props again. do you guys ream your prop holes larger, or drill the holes larger ??
well when I started in with planes I was told to use a reamer to enlarge the prop holes. I asked why a reams and not a drill, he told me that "drills can do funny things".. I found that funny cause a reamer can do funny things too, like not ream straight.
but I have found some good pilots on YT that use drills.
what's your take on this. cause I don't see why if you use a drill press it won't drill straight, or move off center ??
Jim
10-22-2021, 05:44 PM
My Feedback: (1)
Hey Pete, where you been, been thinking of you !! I hope things are good with you !! I mean, being up side down all the time I sure hope you have not fallen off the Earth, I worry about that you know !!
Keep good Pete, keep good !!
your friend,
Jim
Keep good Pete, keep good !!
your friend,
Jim
10-22-2021, 07:32 PM

I use standard, machine reamers modified by grinding a pilot on the nose. I then sharpen the shoulder of the flutes to do the cutting. I do the actual reaming operation in a lathe or fixtured in a drill press or vertical mill.
Pedro,
Looks like a thread root fracture. Could have come from any of many causes. A relatively uncommon event. Heating and reforming a 15 degree pipe is not all that difficult, I cam give direction and lend you the tools if needed. I made up a pair of tubes with female end threads that make easy work of it.
Last edited by Jesse Open; 10-22-2021 at 07:40 PM.
10-22-2021, 10:59 PM
A couple weeks ago I was out flying my Sig 4 Star 60. I have a Saito 80 in it spinning a APC 13X7. I have flown this plane for years. I made a low high speed pass and it sounded better than ever. I made a few more low passes thinking this sounds great. Soon I realized when I pulled up and made a hard turn it was going lean. I landed and this is what I found. I broken exhaust header. Looking online from the usual suppliers I could not find a new 60 degree header. Finaly I found 2 new ones on Ebay at a good price and bought them. Have they been discontinued? What caused it to break like this?
For the last 4 or 5 years I make it a habit to install the engine in such a way that the muffler can be turned towards the centreline (usually a sidewinder mount with the muffler tucked under the engine from right to left) like here:
10-22-2021, 11:31 PM
hey guys, back to props again. do you guys ream your prop holes larger, or drill the holes larger ??
well when I started in with planes I was told to use a reamer to enlarge the prop holes. I asked why a reams and not a drill, he told me that "drills can do funny things".. I found that funny cause a reamer can do funny things too, like not ream straight.
but I have found some good pilots on YT that use drills.
what's your take on this. cause I don't see why if you use a drill press it won't drill straight, or move off center ??
Jim
well when I started in with planes I was told to use a reamer to enlarge the prop holes. I asked why a reams and not a drill, he told me that "drills can do funny things".. I found that funny cause a reamer can do funny things too, like not ream straight.
but I have found some good pilots on YT that use drills.
what's your take on this. cause I don't see why if you use a drill press it won't drill straight, or move off center ??
Jim
Balance after drilling, so whatever inaccuracy has sneaked in the position of the hole, the prop will be balanced around that new center.
For larger props, like 16" or more, I use the lathe. I first go find a drill or piece of rod that properly fits the original hole of the prop, and chuck that in the lathe (in case I use a drill, then the boss out)
I attach a suitable piece of flat and straight wood to the toolpost, run it up to the rod and align it perpendicular to the rod.
Slip the prop on the rod, then clamp down the prop to the toolpost, so it is centered and straight.
Unchuck the rod, replace it for the desired diameter drillbit (as short as possible in the chuck to reduce flex).
Drill the hole, and balance the prop after drilling.
A bit of a procedure, but fortunately I do not break many props...
 10-23-2021, 02:02 AM
Senior Member
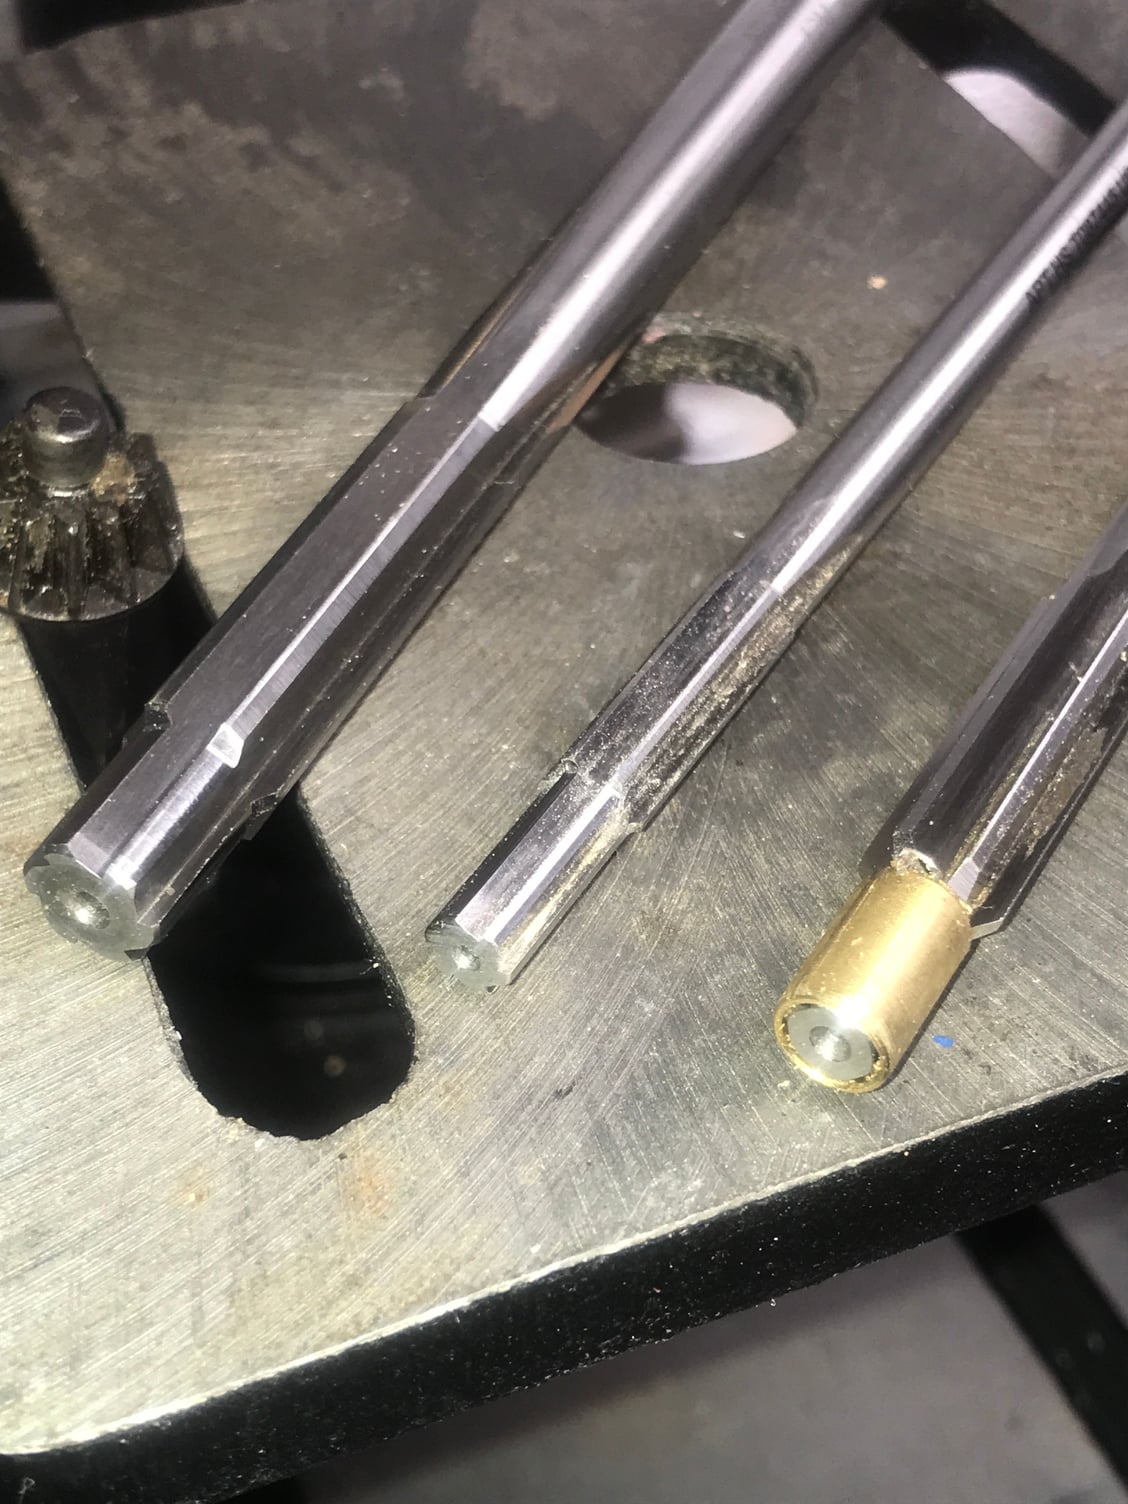
I ran into a problem with the HY props, formerly Bolly. They come with 6 mm holes. I bought a step reamer with 6 and 7 side by side and a separate 7 mm bar like Gary shows. The steps are only about .25" long so I start with the stepped reamer and finish with the bar. 10 mm exhaust parts are getting hard to find as are 12 mm also.

10-23-2021, 02:44 AM
Pedro, was the FA80 one of those swap meet specials you picked up? The header pipe could have been stressed during a crash or run with an out of balance prop by the previous owner? FWIW, I have not had that happen.....yet.
Jim, in my experience a hand drill + drill bit = inconsistency. I ruined a few props before purchasing reamers. Easy enough to ruin a prop using a reamer with a hand drill too.
Using a piloted or stepped reamer on a drill press works fine for me. I check balance and blade tip tracking before and after reaming to make sure I'm not messing things up.
I start the reamer in the front of the prop hub. If for any reason the reamed hole ends up out of perpendicularity with the hub face the prop can many times be salvaged by turning the prop over and reaming to a larger size part way through the prop hub from the rear. In this case the prop will center on the crankshaft at the front and rest flat against the prop drive washer/hub at the rear when tightened up. In fact, reaming a hole that fits the crankshaft in front and a larger one in the rear is per APC's recommendations.
Last edited by Glowgeek; 10-23-2021 at 06:46 AM.