


T1 Models Euro Fighter build

 11-09-2017, 07:28 AM
#52


Next time out I will try and find someone to video it. One of the most fun planes I have ever flown. Its scale yet its an everyday flier and flies fantastic. My 15 year old son had no problem with it and he likes it more then any plane he has flown.
11-09-2017, 11:34 AM
#53

Join Date: Feb 2015
Posts: 208
Likes: 0
Received 0 Likes
on
0 Posts
Would love to see it in the air! Like many!
11-13-2017, 02:57 PM
#54
Any additional photo/video of the red tail + canard nice livery too ? And also of the others if any 
Thank you
Thank you
11-23-2017, 07:13 AM
#56
More pics.
all the airvalves went under the equipment tray. It was a challenge to fit them all. Used 6 in total. Sequenced was done in the dx18 for the canopy and gear doors. The airframe is springloaded down then air power lifts it.
the gear has twin. Airvalves to lift and lower the gear. This makes it work very smooth with plenty of power.
11-23-2017, 02:02 PM
#58
Thank you for the nice photos! It really looks a nicely done model!
P.S. Any additional photo of the whole model or other details is very appreciated
P.S. Any additional photo of the whole model or other details is very appreciated
 11-24-2017, 01:49 PM
#60
I'm Italian and of course I love an Italian scheme and I hoped T-One included it in the 7-10 available, but there's not.
Any extra price for color scheme you requested ?
Which Italian 100th scheme did you chose exactly ?
Thank you
11-25-2017, 11:45 AM
#61
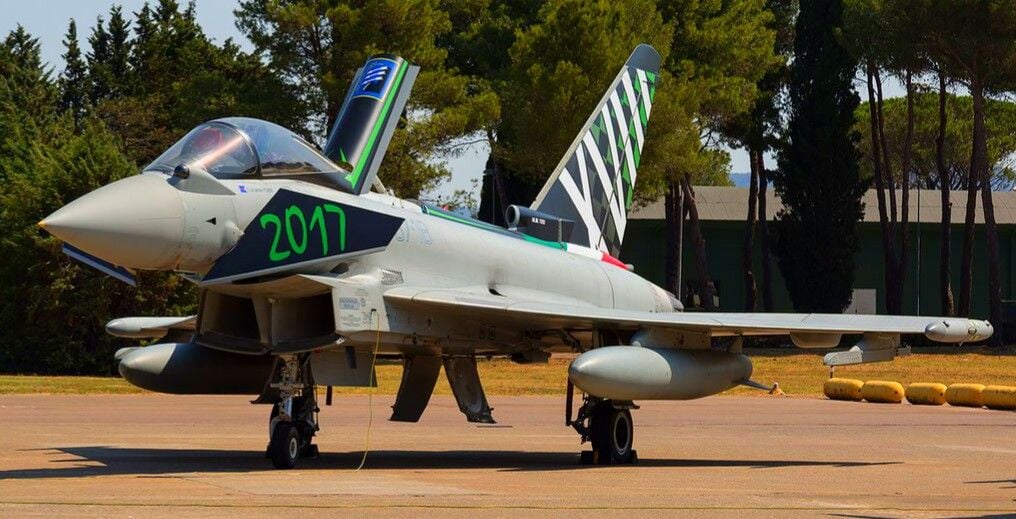
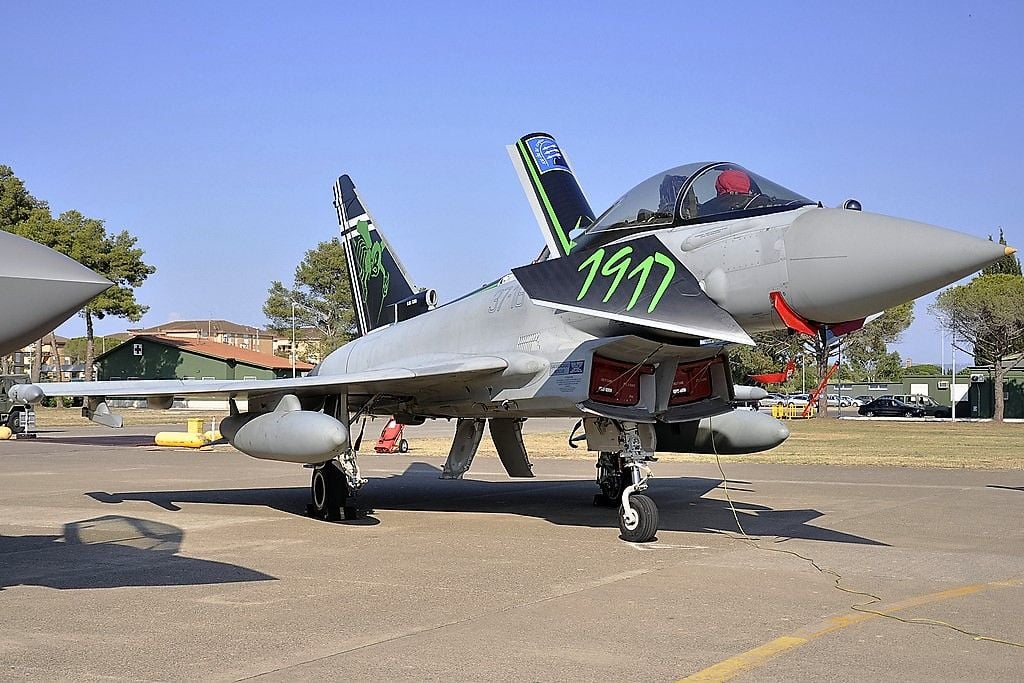
I was able to get the scheme made for no extra charge. I won't show exactly which scheme I picked until I get it, but as you may have guessed it's one of these four. No doubt they'll offer it as a standard scheme once they get it built. Less chance of someone else having one on the midwest circuit this summer if I delay the advertisement.
11-25-2017, 12:22 PM
#62
Join Date: Feb 2015
Posts: 208
Likes: 0
Received 0 Likes
on
0 Posts
Well all of them are gorgeous! I would choose lower left
What's your waiting time? I share your anticipation
Congrats and good luck too!
George
What's your waiting time? I share your anticipation
Congrats and good luck too!
George
Last edited by Signofinfinity; 11-25-2017 at 12:24 PM.
11-25-2017, 03:21 PM
#63
All 4 schemes are beautiful!
I look fwd to see your Typhoon celebrative inalian scheme hopefully asap!
I look fwd to see your Typhoon celebrative inalian scheme hopefully asap!
12-21-2017, 03:27 AM
#66
Join Date: Feb 2015
Posts: 208
Likes: 0
Received 0 Likes
on
0 Posts
Great!
Thank you so much for sharing!
Did you use factory recommended throws and cg?
What rates did you use?
Thank you so much! Love seeing it fly!
A few more weeks! It was in the paint shop as told by Mr. Kim!
Excellent flight!
Thank you so much for sharing!
Did you use factory recommended throws and cg?
What rates did you use?
Thank you so much! Love seeing it fly!
A few more weeks! It was in the paint shop as told by Mr. Kim!
Excellent flight!
 03-19-2018, 05:27 AM
#72
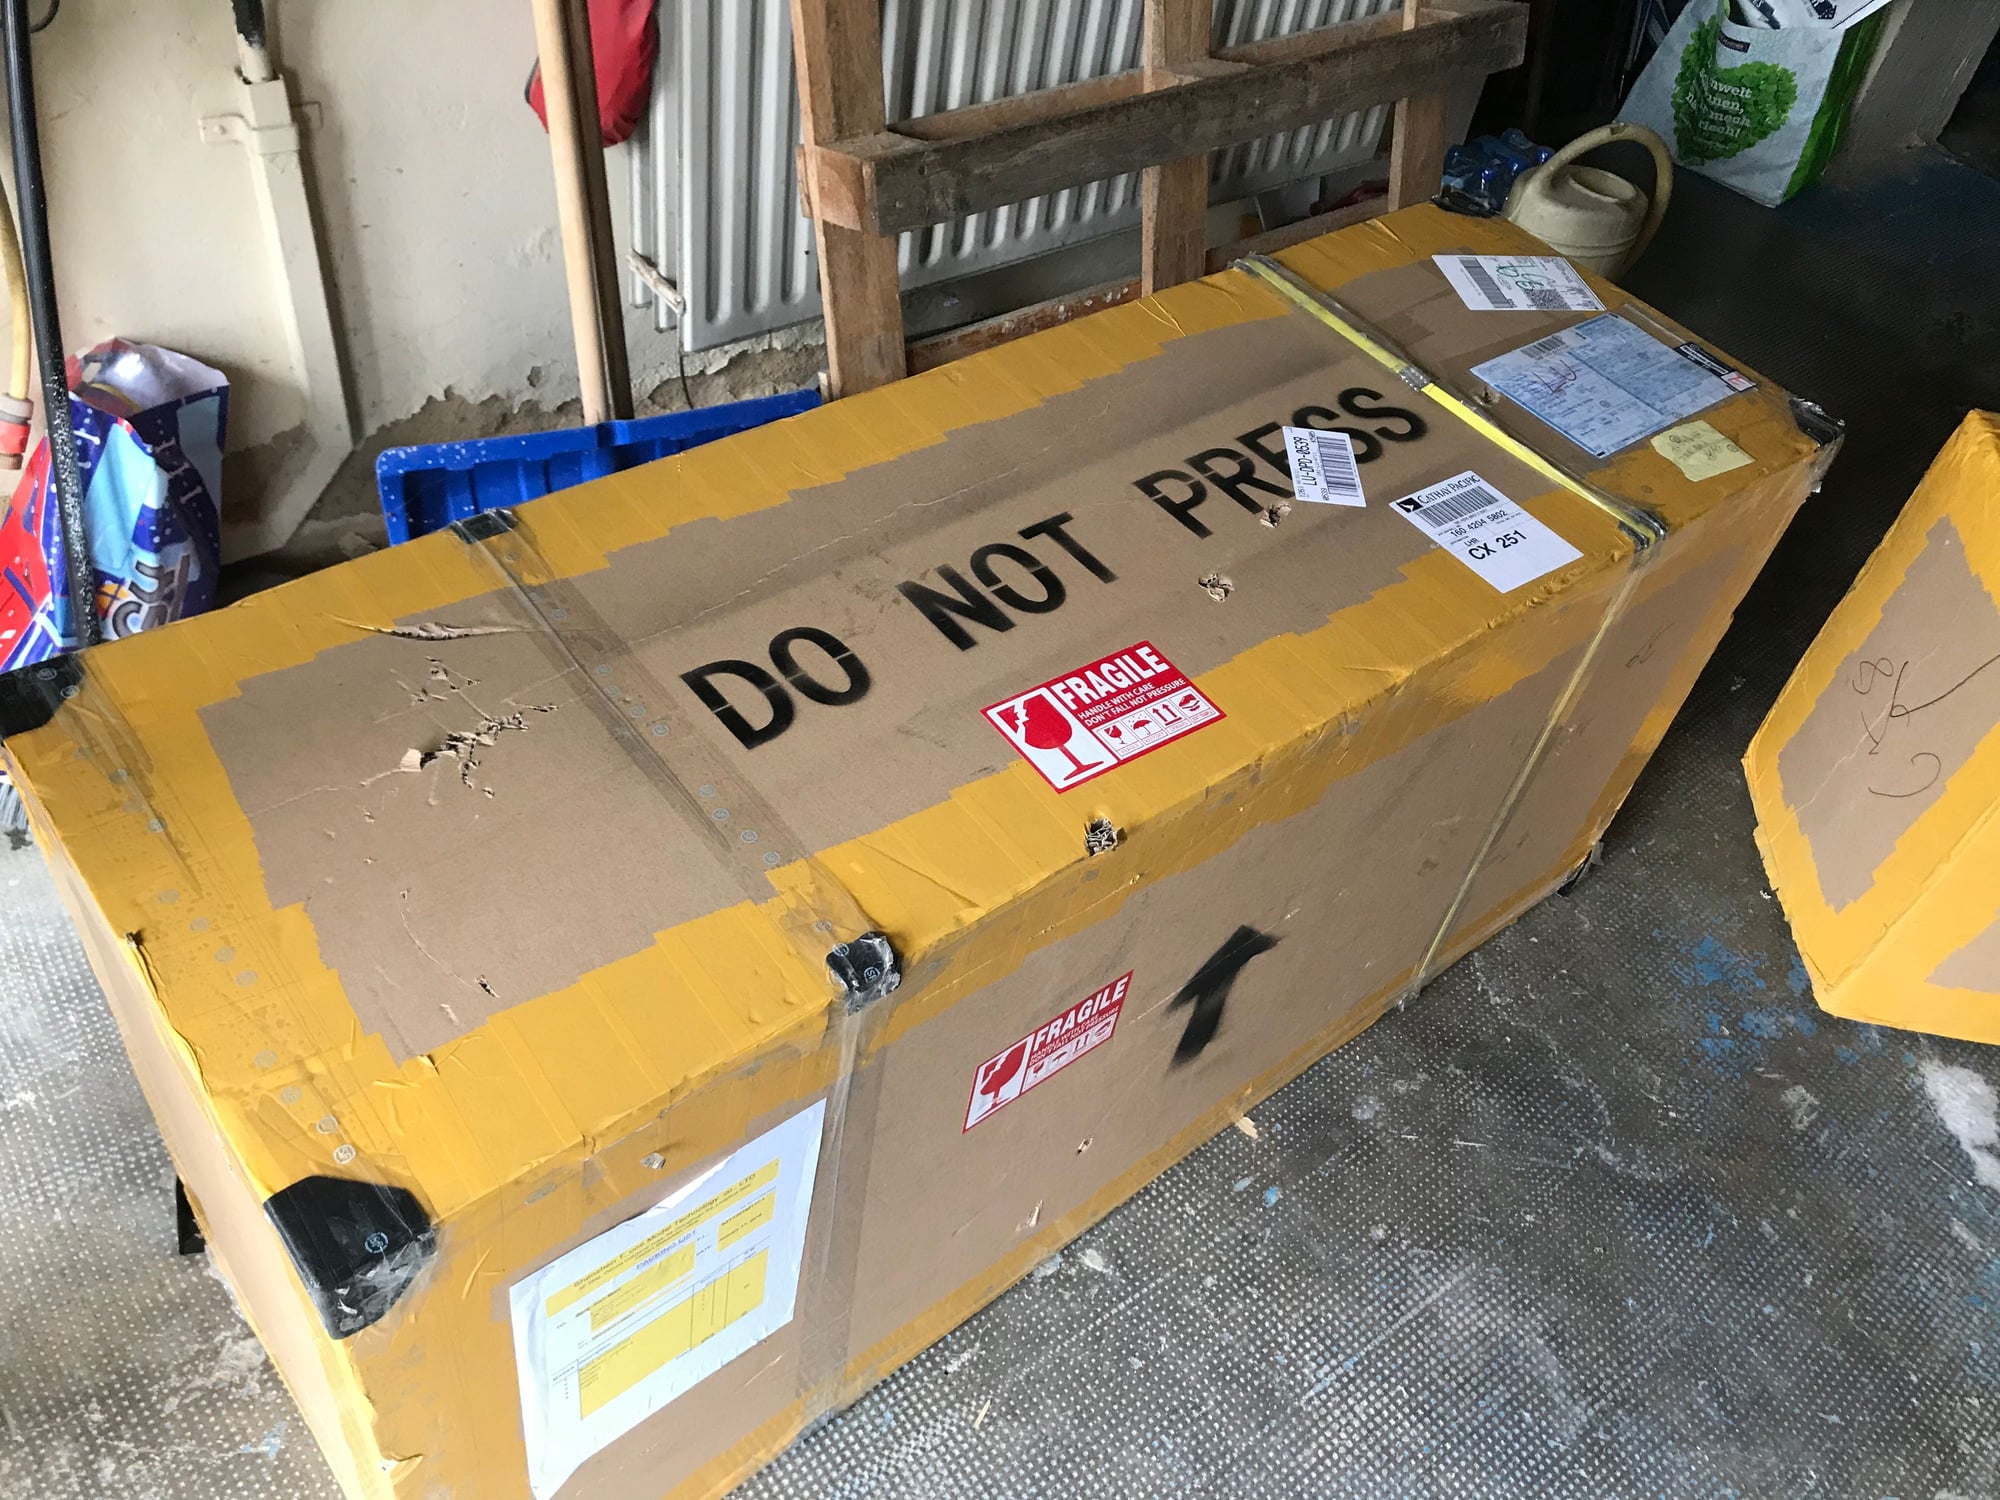
I too received my Eurofighter. I thought I'd provide some information to help with the build process. The manual is very sparse, and has very little information. I'll try to help by showing my solutions to issues as they arise.
Here's my first impressions. The box came undamaged, and everything was packed well. I didn't have any issues due to shipping. The aircraft looks great and the quality overall appears to be excellent. The surface details are fairly well represented. They did a good job on the paint scheme I provided. I chose an Italian special scheme that commemorates the 100th anniversary of an Italian squadron. The landing gear looks very nice and well made. The quality of the hardware appears to be decent. The Y-pipe looks sturdy and should be up to the task. All of the lighting is installed and upon testing worked fine.
Here's the scheme I chose. I'm a bit of a scale nut, so I'll be making some changes and will make an extra effort to improve the scale appearance of the plane. On with the build.
03-19-2018, 05:39 AM
#73
When determining the order of assembly I took into account what would be in the way for the following gear. I know the canard servo is up in front, and I have the full cockpit kit, so I need to get those figured out before I start mounting stuff that will be in the wrong place.
First thing I did was get the canard servo mounted. Because of the way they mount, an aluminum servo horn is a must. I used some of the provided hardware mixed with some of my own. I made the connection to the servo horn as short as I could. To do it right, the horns on the canards should be longer to help with the leverage. That would make it harder to clear the cockpit though. I added some washers where the canard horns meet up with the mounts. In the end, I think they are stiff enough. I've had experience with Canards before, and they don't have to be super stiff to function properly. If you use only one servo, make sure it's fairly strong. The Savox SA-1256TG servo I used has titanium gears and 277 oz-in at 6V. Be aware that the cockpit needs to run fairly close to the back of the arms on the Canards.
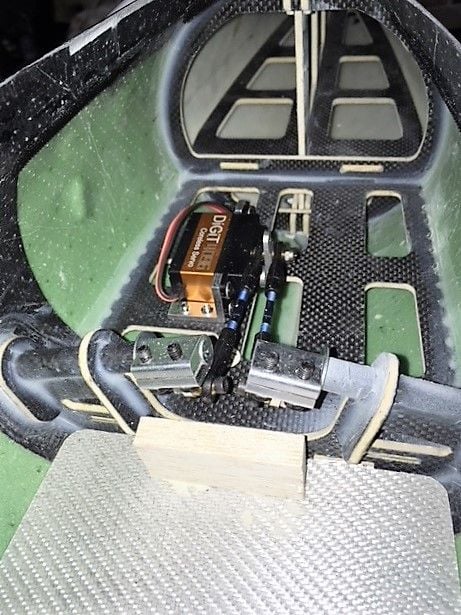
Canard Hardware
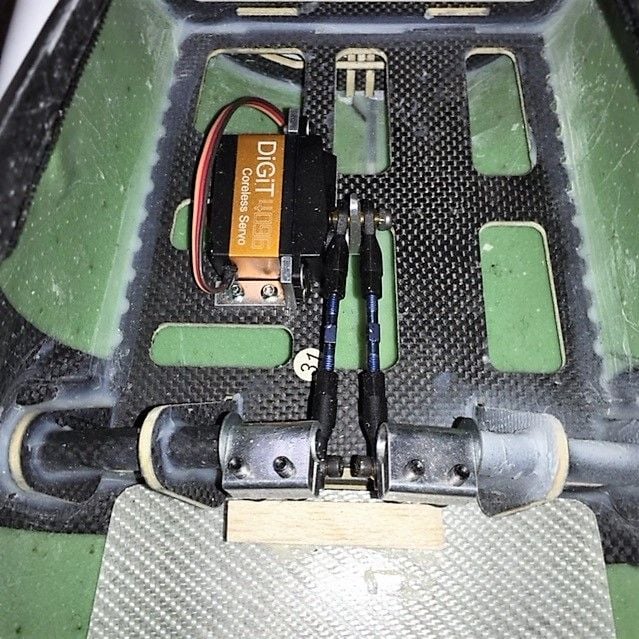
I added washers where the horns clamp to the canards
First thing I did was get the canard servo mounted. Because of the way they mount, an aluminum servo horn is a must. I used some of the provided hardware mixed with some of my own. I made the connection to the servo horn as short as I could. To do it right, the horns on the canards should be longer to help with the leverage. That would make it harder to clear the cockpit though. I added some washers where the canard horns meet up with the mounts. In the end, I think they are stiff enough. I've had experience with Canards before, and they don't have to be super stiff to function properly. If you use only one servo, make sure it's fairly strong. The Savox SA-1256TG servo I used has titanium gears and 277 oz-in at 6V. Be aware that the cockpit needs to run fairly close to the back of the arms on the Canards.
Canard Hardware
I added washers where the horns clamp to the canards
03-19-2018, 06:12 AM
#74
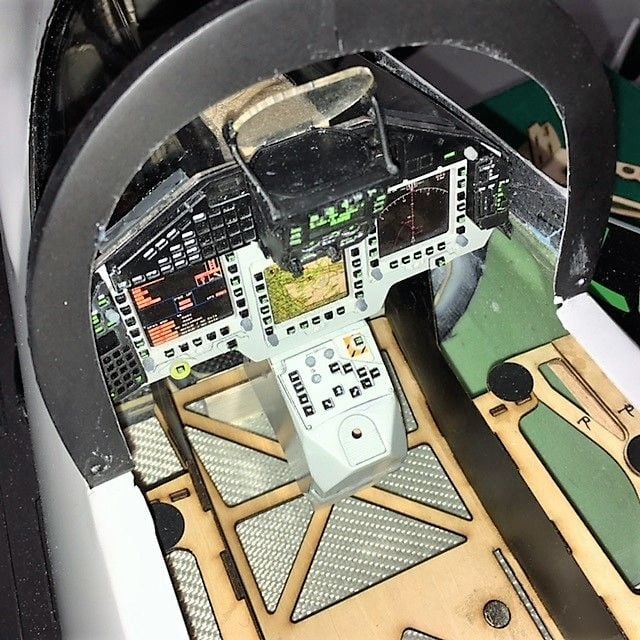
The cockpit kit is quite nice, and even has instructions! (that's a joke). They don't show much, but if you stare at it long enough you figure out what they are doing. My photos should help. I plan on having some air valves under the cockpit, so I want it to be removable. I'll use the magnets they provide, as well as some of my own. Before gluing, do plenty of test fitting. I found the the cockpit fits well with the back edge sitting on the lip where the nose assembly bolts up. I added a balsa block in the front to support it a bit better. I used some angle stock to give a bit more surface to glue with. As usual, when gluing to fiberglass, or anything like it, I use Hysol 9462 (Aeropoxy). I also used magnets to attach the console to the dash, and the dash to the cowl. The cowl (piece under the windshield) will be attached using Velcro. I had to space the console up just a bit to get the right height. Once everything is in place, the pilot and seat drop in last. With it all in I think it will stay put since it's a tight fit
.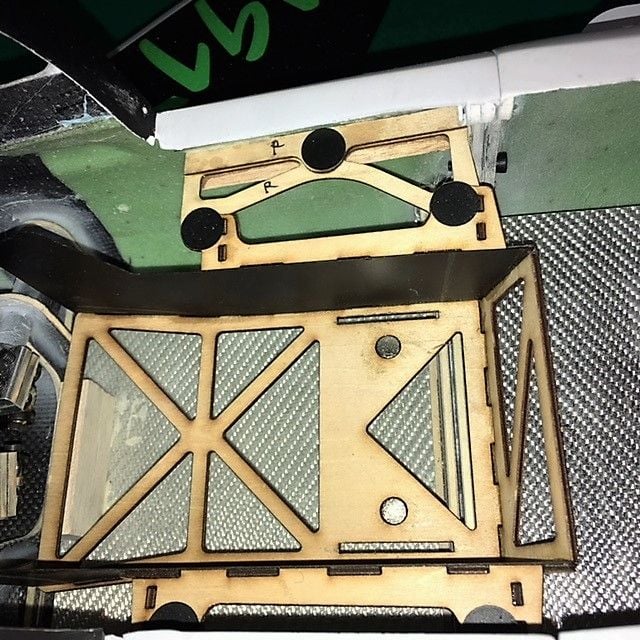
Cockpit tub mounted
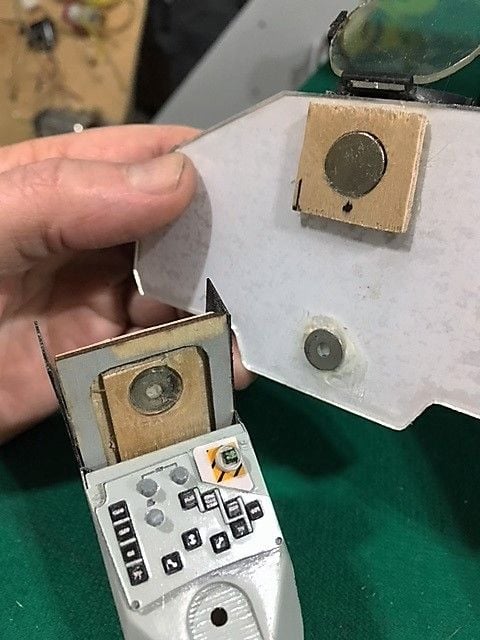
Magnet holds console to dash, dash to cowl
Dash panel with magnet and bracing
.
Cockpit tub mounted
Magnet holds console to dash, dash to cowl
Dash panel with magnet and bracing
03-19-2018, 06:24 AM
#75
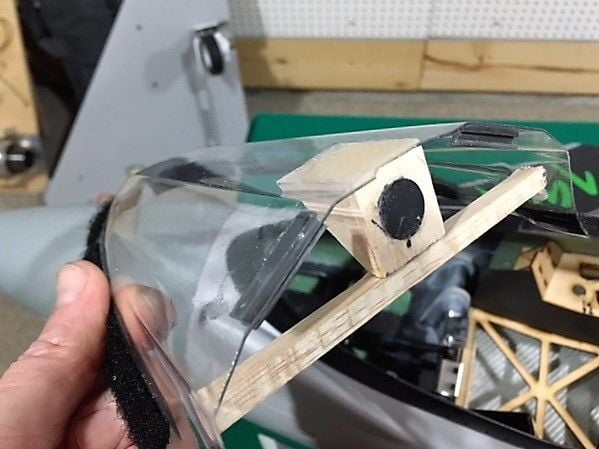
The pilot I used is a 10" figure from warbirdpilots.com. He fit fine with no trimming. At about 1:7 scale he's the perfect size. I'll mount him to the seat during final detailing. I will make the cockpit look even better at that time, but for now I needed to know where everything would go before I started to install the gear. Here are a couple photos showing the fit. I left the foot pedals off, they get in the way and can't be seen anyway. You'll have to wait for the final cockpit photos, that will be later in the build. I attached a side view showing the fit in the canopy. It seems to be about right. Dash panel and gun sight also sit in the right place when compared to photo references.
Dash installed
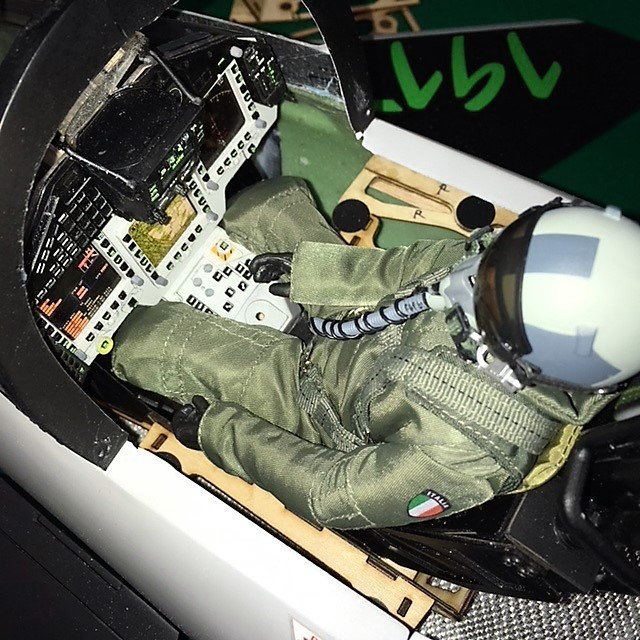
Pilot installed
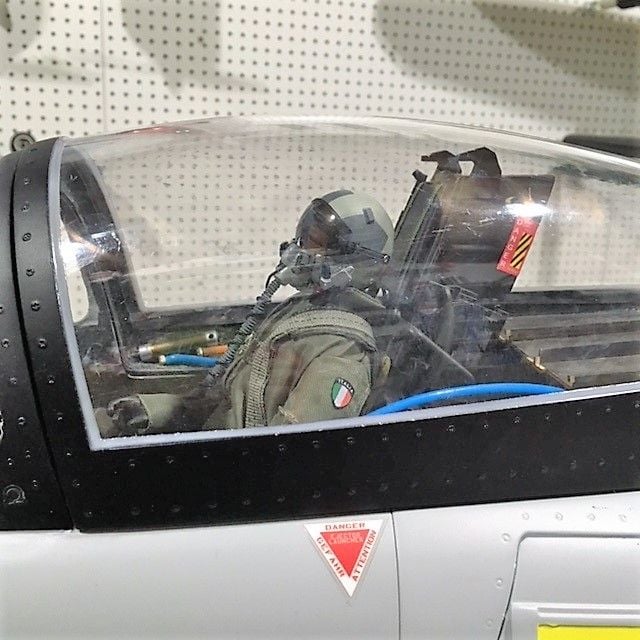
Seat clears canopy
Dash installed
Pilot installed
Seat clears canopy